Tuesday, August 18, 2009
Vote For Me
The folks over at Lens Pro To Go are having an Amazing Moments photo contest. One of my photos made the top 20. You can see the top 20 and vote for mine (#4) at the Amazing Moment Top 20 Page. Even if you don't vote for mine please vote as there are some pretty awesome shots there.
Monday, August 10, 2009
Which Version Do You Prefer?
Quick question: Which of these two images do you like better?

Original

Alternate Crop

Original

Alternate Crop
Thursday, August 6, 2009
New Backup Drive
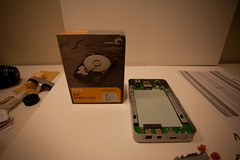
New Backup Drive
Originally uploaded by zackojones
Quick question: When was the last time you backed up your photos? Can't remember -- well you'd better back them up. Next question: When was the last time you backed up your back up drive? If you're like me you'd probably answer never to the second question. Well let me save you some grief. Backup your backup drive. Several months ago I backed my backup drive to DVDs. It took me all weekend to do it but I was glad I did. Especially when I came home one day to find my backup drive had died.
I tried called the drive manufacturer. It was long out of warranty so the technician suggested I remove it from the case and try it in my desktop computer. I tried it and the computer would not boot with the drive installed so I removed it.
I next bought an external drive enclosure and installed the drive in it. Windows would see that some sort of drive was there but couldn't do anything with it.
Long story made short: I lost several months of photos because I had moved the only copy of them onto the external hard drive. I have since become a bit obsessed with backing up my photos. My new process is as follows:
Download to C:\Photos folder
Go though the photos and delete the bad ones.
Copy want I want to keep to Z:\Photos which is a separate physical hard drive 1 TB in size.
Import photos into LightRoom
Backup Z:\Photos to External HD #1
Backup External HD #1 to the new backup drive shown in this photo.
I then put External HD #2 into our media rated safe.
I figure with originals on C:\Photos, copy on Z:\Photos and two additional backups odds are I'll never lose another group of images again. External hard drives are cheap. Best Buy has them on sale every week. Buy two and double backup your photos. I can't tell you how sick of a feeling you experience when you realize your photos are gone for ever. Trust me, that's pain and suffering you don't want to experience.
Thursday, July 16, 2009
SOOC Sunrise

SOOC Sunrise
Originally uploaded by zackojones
Just wanted to share the lovely view I had on my way to work this morning. This was taken with my 40D and 18-55 kit lens.
Wednesday, July 15, 2009
DIY Light Diffuser

I recently discovered Steve Berardi's PhotoNaturalist web site and blog. Steve put together an eBook containing 13 tips for better wildflower photography.
Tip #3 - What to do if you can’t wait for perfect light shows you how to make a diffuser from a shower curtain and clothes hanger. This is a great idea but I thought that carrying around a clothes hanger may be a bit of a pain so I starting thinking of ways to create a portable diffuser. I've been reading about many of the DIY photography projects so I thought I'd give this a try as it seemed like a pretty simple thing to create.
My first approach was to create a holder that looked very much like a football (United States variety) goal post. In the upright posts I'd cut a slot and then slide the curtain down through the slot and secure it in place with a cap on the end of the upright. After making the first cut in one of the upright pieces I knew this approach woudldn't work because once I cut the PVC pipe it was long longer the same diameter as it was before the cut. It was smaller which meant the caps would not stay in place like I wanted. So I scapped that idea.

My next idea was to create a big square to hold the shower curtain along with some sort of handle to hold it. The completed version is shown at the top of this blog post.
Materials used
3 - 1 inch X 5 feet long PVC pipe pieces ($1.77 ea, 5.31 total)
1 - 5 pack of 1 inch elbows ($2.16)
1 - 5 pack of 1 inch caps (2.39) not really needed for this project so you can skip those if you want.
1 - 5 pack of 1 inch "T" fittings. ($2.66) I only need one but figured I'd use the rest for other projects.
1 - Vinyl Shower Curtain (99 cents, I think)
Cutting - PVC
You'll want to measure your PVC pipes. Mine were a bit longer than 5 feet long so I had to make two cuts on one.
Cut 3 30 inch pieces of pipe. This forms the side and top of the frame.
Cut 2 14 inch pieces of pipe. This forms the bottom half of the frame and leaves room for the "T" fitting.

Cutting - Shower Curtain
Unpack the shower curtain and then fold it in half and cut on the fold line.
Take one half of the curtain and fold it in half again, cut it.
This will give you a big enough piece of curtain to fit over the frame.
Assembly
Put the two 14 inch pieced of PVC pipe into the T
Attach elbows, pointing up at the other end of the 14 inch pipes.
Insert a 30 inch piece of PVC into the top of each elbow.

On the 3rd piece of 30 inch PVC pipe insert both elbows.
Slide the 3rd piece of pipe onto the other two pieces to complete the frame.
Make sure all connections are good and snug.
Attach the curtain using tape or clamps.
Presto, you're done. Now you don't have any excuses for not getting great flower shots :). Thanks to Steve for giving me the idea!
Wednesday, July 8, 2009
To Do List
I once heard or read the phrase "The shortest pencil is longer than the longest memory."
Since I can't recall if I read it or heard it I guess I should have written the source down, huh. :)
With that in mind here's a to-do list for future blog posts in no particular order
Cameras
- 5D
- 40D
- PowerShot D10
Lenses
- 50mm
- 100mm
- 200mm
- 400mm
- 17-40mm
Equipment
- Mononpod
- Tripod
- External Card Reader
- 580 EX II flash
- GPS Tracker
- Wired Remote
- Wireless Remote
- Cactus Remote Flash Triggers (aka Poverty Wizards)
- External Hard Drive
Software (Desktop)
- Downloader Pro
- RoboGeo
- LightRoom
Software (iPod)
- DSLR Remote Pro
- Handi 5D
- Handi 40D
- Sunrise, Sunset
- Blog Posts that have had an impact on me
- Blogs I read regularly
Tuesday, July 7, 2009
An Introduction
Thanks for stopping by and reading my blog. I plan to use this blog to pass along bits of knowledge I've picked up since rediscovering photography after taking a few years away from it. I've was a pretty active photographer while stationed in Iceland way back in the 80's. Over time the camera ended up sitting on the shelf. As luck would have it I had an opportunity to travel to Tel Aviv, Israel for work and took along a Canon S3 IS camera. While there I took a bunch of photos and started getting the photography bug again. When I found out I would be making a second trip back to Israel I knew I wanted to take a better camera. Having shot Canon's in the past I settled on the Rebel XT (the guy at Best Buy said the XTi was a little too advanced for me -- I shouldn't have listened, but I digress). I went back to Israel with the XT and took a ton of pictures. By the time I returned I was totally hooked and I've been hooked ever since.
My current camera line up includes the following equipment:
Canon 40D
Canon 5D
Canon PowerShot D10 (Newest purchase and we're digging it!)
Canon EF 50mm f/1.4
Canon EF 100mm f/2.8 Macro
Canon EF 200mm f/2.8L (My most used lens)
Canon EF 400mm f/5.6L
Canon EF 17-40 f/4L
Canon 580 EX II
I have other stuff such as a tripod, remote shutter release, Monopod, etc and I'll write about those in a future post.
Again, thanks for stopping by and I hope you learn a thing or two along with me.
Subscribe to:
Posts (Atom)