Showing posts with label DIY. Show all posts

Wednesday, August 11, 2010

Ground Pod Working Height

As I have experimented with DIY Ground Pod ideas one thing that has come to mind is what is the working height of the ground pod. Afterall what good is having a Ground Pod if you have to contort yourself into a pretzel to use it?! With this in mind I setup my gear on the PVC Ground Pod, Frying Pan Ground Pod and Induro Tripod with legs fully splayed.
Working Height PVC Ground Pod
Click Image to View Larger
Working height for the PVC Ground Pod is approximately 10 inches with Gimbal Head installed.

Working Height of Frying Pan Ground Pod
Click Image to View Larger
Working height of the Frying Pan Ground Pod is approximatley 11 inches with Gimbal Head installed. I've done some shooting with this setup and it works pretty. What's cool, silly as it sounds, is the sound that resonates through the frying pan when you click the shutter.

Working Height of Induro Tripod
Click Image to View Larger
Working height is a little less than 16 inches when using the Induro CT314 tripod with Gimbal Head installed. I'm beginning to think I may not need a Ground Pod afterall. My Induro Tripod gets me within a few inches of the other two solutions and I'll always have my Induro Tripod with me. I guess I'll know for sure after I've had a chance to try all of the different soltuions out in the coming days.

For those of you that have a Ground Pod, either store bought or DIY what's your approximate working height? I realize there's numerous factors such as ballhead height, Gimbal Head height, etc but I'd be curious to know how low your ground pod gets you.

More Ground Pod Modifications

I did some additional modifications to the PVC Ground Pod idea to see if I could make things a bit more stable and I found a simple solution that works.

Stable PVC Ground Pod
Click Image to View Larger
By drilling and screwing three screws into the PVC pipe as shown above the issue with the ballhead/gimbal head rotating was resolved.

Modified PVC Ground Pod
Click Image to View Larger
I shot a few shots in the back yard with this setup and it seems work work well. I'll have to try it out in the field sometime this week and see how it performs. I think this solution may work -- it's light, will breakdown and fit in my backpack for sure but I don't know if it's quite stable enough to hold the ballhead/gimbal head & camera/lens. Notice how much wider the ballhead is than the PVC pipe. One benefit of living in a neighborhood where there's new construction going on is with a little scrounging about you can find stuff for DIY projects. As luck would have it I scored a short section of thicker PVC pipe last night so now I have yet another idea for a DIY Ground Pod. I'll be working on that idea tonight so stay tuned -- there's more to come.

Monday, August 9, 2010

Ground Pod Modifications

In my DIY Ground Pod Post I posted some ideas I had for a DIY Ground Pod. I've had a chance to do some more experimenting and here's the results from the first round of experiments....


Inverted Frying Pan
Click Image to View Larger
This new configuration works much better but I'll tell you it was a pain to saw that damn handle off of the pan!

Nut and Bolt on Bottom Side of Pan
Click Image to View Larger
By inverting the pan there's no longer a problem with the nut and bolt extending from the base and getting snagged on something.

No More Handle and Lid for Base
Click Image to View Larger
I had considered gluing the pan to the bucket lid since I can't use it now but I think I'm going to hold off on doing that for now. If I do glue it then I'll still need to leave some sort of opening so that I can get to the bolt to be able to loosen the ballhead from it. If you'll look closely you'll see that after getting 3/4 of the way through the handle I got tired of sawing and just bent it back and forth until it broke :).

In Use With Liveview
Click Image to View Larger
This setup works pretty well. Of course I think most setups would when you're shooting from a nice smooth concrete pad :). I will try and do some field testing this week or this coming weekend.

Know Your Knobs!
Click Image to View Larger
I did learn something today and that's to make sure you know your knobs. See how the two knobs are close together in the picture above? Well twice I loosened the knob for the lens plate when I meant to loosen the knob for the lens so I could rotate it. Next time I'll position the knob for the lens plate towards the bottom so there's only one knob on top. Don't make this mistake!

Friday, August 6, 2010

DIY Ground Pod Ideas

Recently I watched some Moose Peterson training on the Kelby Training web site. The training was on shooting birds in Florida and during it he used a ground pod. His was a nice looking medal one which he promptly sat in an inverted frisbee so he could slide it on the sand easier. When I saw him using it I knew I wanted one so after checking around online and discovering companies want $150.00 for one I figured there's got to be some sort of DIY solution. There's a great example of one on YouTube just search for DIY Ground Pod to check it out.


While walking through Lowes the other night I saw these bucket lids at the end of one of the rows in the paint department. Immediately I thought about the ground pod so I bought two of them and enough 3/8 inch nuts and bolts to try and create my DIY ground pod. I ended up coming up with 4 ideas for creating a ground pod and this post summaries each of those proposed solutions.
Possible Ground Pod Solutions
Click Image to View Larger
Solution #1 - The bucket lid
Ballhead Mounted to Bucket Lid
Click Image to View Larger
At first I thought the bucket lid was going to be the perfect solution. It was light, made of plastic so I couldn't have to worry about water, and it looked like there was enough room to put the bolt through it and not have it drag on the ground. 
Bad Idea
Click Image to View Larger
In order to not have the bolt drag on the ground I would either need to cut it or provide some kind of spacer to fill this gap (NOTE TO SELF -- use a wooden block to fill the gap -- sorry I had to write that idea down before I forgot it).
Better Idea
Click Image to View Larger
Using this configuration for the nut and bolt allows the ballhead to be mounted closer to the lid but it's still too flexible to use so at this point the bucket lid is a no-go. I'll update this post after I have a chance to try a wooden spacer.

Solution #2 - The Frying Pan

Yes that is a non-stick frying pan. We recently bought a couple of new ones so I was able to use this one for my little project.
Nut and Bolt Attached to Pan
Click Image to View Larger
If you think about it the pan will be sitting on the ground so having the nut and bolt extending from the bottom shouldn't be too big of a deal.

Camera Mounted
Click Image to View Larger
While this setup seems to work who honestly wants to lug around a frying pan all day. I suppose if I cut off the handle it would be a little easier to manage but it's held on with four big rivets and I'm not sure I want to try and grind them off. I think I'll save this for when I have to go shoot some place where I could use a frying pan for protection :)


Solution #3 - The block of Wood

I wanted to try this setup after watching the video on YouTube so I grabbed a piece of scrap wood and drilled holes in it as you can see below.
Counter Sunk Bolt on Bottom of Wood
Click Image to View Larger


Top of Wood
Click Image to View Larger
The mounting method shown below has some promise to it but there's one big flaw. The wood isn't wide enough to provide proper support. When mounted like this everything tends to fall to the left.
Camera Mounted
Click Image to View Larger
Shown below is the mounting method that worked best so far. I think If I added some sort of extension to the piece of wood I may have a workable DIY Ground Pod.
Alternate Camera Mount
Click Image to View Larger
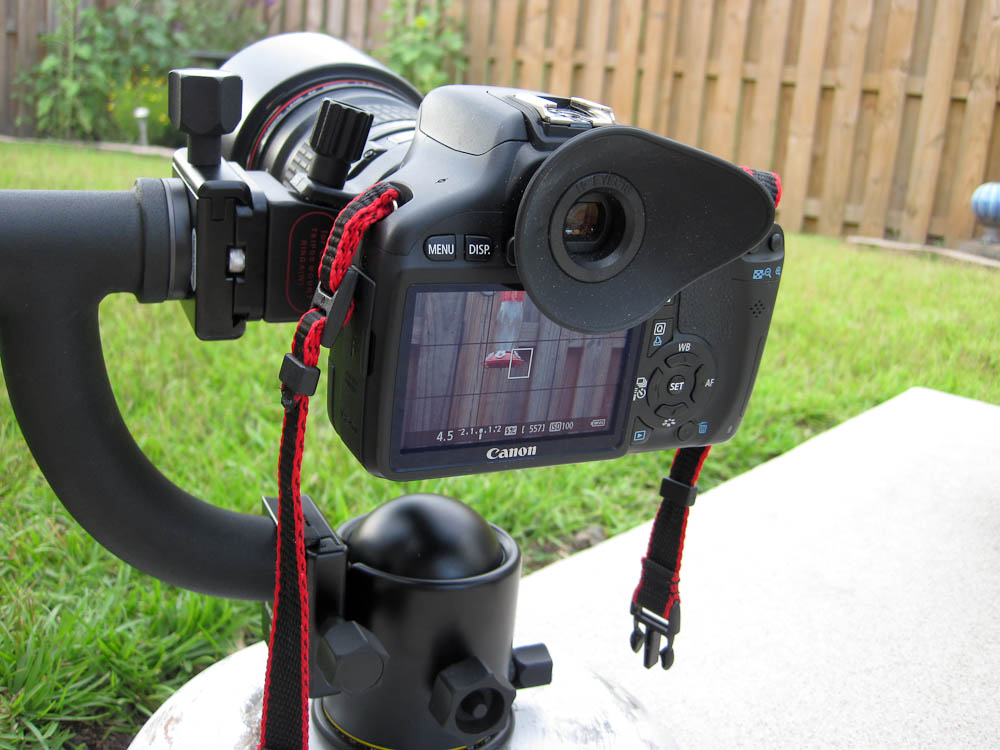
Solution #4 - PVC Pipe


On the way home today I got the idea of using some PVC pipe I had left over from a project so I clobbered together a "T" using connectors, caps, and pipe I had available. Below shows the mounting bolt ready for the ballhead.
PVC Pipe Mount
Click Image to View Larger
Here's the camera mounted on the PVC T and this seems to work pretty well. I think I may be onto something with this one.
Camera Mounted
Click Image to View Larger
Granted I didn't glue the pipes together and you probably wouldn't want to either to keep things portable but there's one problem with this solution as it is now. The weight of everything mounted on the PVC pipe makes it want to rotate at this T fitting. I'm certain this problem could be solved by either gluing the short PVC pipe into the base of the T fitting or drilling a hole and putting a set screw in it to stop the rotation or drilling a hole all the way through the base of the T fitting and using some sort of pin to prevent the ballhead from rotating from side to side.
Rotation Point
Click Image to View Larger
So out of the four possible solutions there's two of them that may work. I'll post and update after I've had a chance to tweak things about. If you've already been there and done that or have any ideas I'd love to hear them.